
01 / START HERE
Remove a simple background in 5 steps
Start here for a subject against a mostly uniform background. Keep the Layers panel visible so you can check the active layer and its visibility.
1Open your image and keep a backup
Choose File → Open. Duplicate the image layer and hide the original using its eye icon. Work on the duplicate so you can return to the untouched image.
2Enable transparency
Select the working layer, then choose Layer → Transparency → Add Alpha Channel. This lets the layer contain transparent pixels. If the command is unavailable because the layer already has an alpha channel, continue.
3Select the background
Choose Tools → Selection Tools → Fuzzy Select (U), then click an area of background. Adjust Threshold until the selection reaches the edge without entering the subject. Hold Shift to add disconnected background areas.
4Remove the selected area
With the background selected, choose Edit → Clear. A checkerboard should appear in the cleared area. If the subject disappears, undo and check which area is selected before clearing again.
5Export a transparent PNG
Choose Select → None and inspect the edges. Use File → Export As, give the file a .png extension, and export. Keep the original layer hidden. Save a separate .xcf project if you want to keep your editable layers.
02 / PICK YOUR TOOL
Which method fits your image?
| Your image | Start with | Watch for |
|---|---|---|
| Mostly uniform background | Fuzzy Select | Threshold spilling into the subject |
| One color in separate areas | Select by Color | Matching colors inside the subject |
| Hair or a busy background | Foreground Select + mask | Missing strands and background fragments |
| A defined, hard outline | Paths + mask | Time needed to trace the shape |
Choose the tool by the edge you need to preserve. A color-based selection suits a plain backdrop; an outline or subject selection gives you more control when colors overlap.
GIMP’s guide to separating a subject03 / FLAT BACKGROUNDS
Remove a white or solid-color background
Fuzzy Select starts from the area you click. For a white backdrop around a colored object, follow the quick method above. Begin with a conservative Threshold and add missed areas instead of removing part of the object.
Select by Color selects matching colors across the layer, including disconnected areas. It can help with a simple logo surrounded by one color.
- Add an alpha channel to the working layer.
- Choose Tools → Selection Tools → By Color Select and click the background.
- Adjust Threshold and inspect the subject for unwanted selections.
- Choose Edit → Clear, then export as PNG.
If the subject contains the same white as the background, switch to a subject selection. Color alone cannot tell those parts apart.
Select by Color reference04 / DETAILED SUBJECTS
Handle hair and complex backgrounds
Foreground Select lets you mark the subject before GIMP calculates a selection. Use it when the background has several colors or the outline needs refinement.
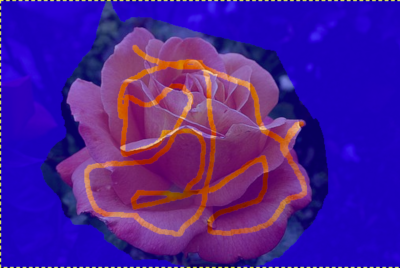
- Choose Tools → Selection Tools → Foreground Select. Draw a loose outline around the subject and close it.
- Press Enter to enter the marking stage. Brush through the different colors inside the subject without crossing into the background.
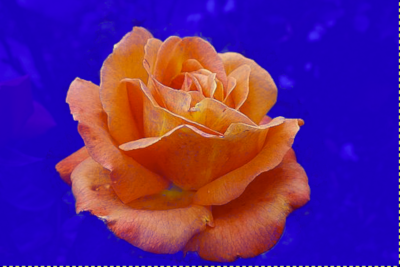
- Enable Preview mask. Mark missed subject areas; use Draw background on unwanted areas.
- When the preview looks right, click Select to finish. Keep this subject selection for the layer mask in the next section.
Zoom in around hair and gaps between limbs. Fine strands against a similar-colored background can still need manual cleanup.
1. Mark the foreground
2. Preview the selection
05 / EDGE CLEANUP
Refine the cutout with a layer mask
A mask lets you hide and restore pixels while keeping the image itself available. Start with the subject selected; if you selected the background, use Select → Invert first.
- Choose Layer → Mask → Add Layer Masks, select Selection, and add the mask.
- Choose Select → None. Click the mask thumbnail in the Layers panel.
- Paint black on the mask to hide leftover background; paint white to restore missing subject detail.
- Inspect the edge over temporary light and dark layers. Hide those checking layers before export.
Use a small brush around difficult edges. Feathering too much softens the entire outline and may create a halo.
Layer mask reference06 / SAVE THE RESULT
Export a transparent PNG from GIMP
Hide the original image and any background layers. Choose File → Export As and name your file with a .png extension. JPEG will not preserve transparency.
Reopen the exported PNG in GIMP and place a colored layer underneath it. If that color shows through the removed area, the transparency is working. Save a separate XCF file to retain the editable masks and layers.
Saving and exporting in GIMPYour cutout is ready. Give it a new setting.
Try a white studio, a color backdrop, or a product scene below. You can also start from your original photo.
Edit this image’s background